Saturday, June 15, 2013

Color Changes in Winogradsky Columns


      The column that had only paper started out mostly clear, then it started to turn orange, and as time passed the water started to turn dark orange.


      The water in the paper and yolk column also started out mostly clear, turned orange, and then it went more towards a grey color. It also started to grow some algae at the top.


      Like the water in the P column and the P+Y column, the water in the paper, yolk, and shell column started out mostly clear, but then it started to get blacker and darker as time went on. It also started to grow algae on the dirt layer.


      The water in the unenriched column started out dirtier than the other columns, and it got a lot darker as time went on. Either some sort of black plant was living in the column, or a lot of the organisms died, causing the water to darken.


      Going from left to right, the images in the pictures were taken on: Dec 20, 2012, Feb 18, 2013, April 10, 2013, and May 5, 2013.


Sunday, May 5, 2013

Winogradsky Columns Final Day!

Hello! Today I will show you what has happened to the Winogradsky columns. I have extracted a few drops of water from the paper+yolk column, and here are my observations.

P+Y Column Observations

To view the water under my microscope, I used a hanging drop mount. You can see how to make one by reading my previous post "Hanging Drop Mount." 


Figure 2 Small cell with tail
Figure 1 Long
worm-like cell
 In the various water drops I saw some small cells (Fig. 2), long worm-like cells (Fig. 1), and micro-organisms that looked like worms (Fig. 3 & 4). I also saw a cell moving really fast. It could be a paramecium. There were many worm-like bacteria, and a few of the fast moving parameciums. There are also some videos of these organisms below the images.

Figure 4 Two worm like micro-organisms.
about 100µm long

Figure 3 Head of a micro-organism.
about 40µm long


Fast moving paramecium
"Zoo" of organisms. At the top of the image, there
 is a cell that seems to spin when it moves

Video of one of the micro-organisms

Two of the micro-organisms

If you look closely, you can see the long worm
 like cell undulate

Monday, December 10, 2012

Distillation of Ethanol

Ingredients

  • solution of 40% ethanol and 60% water
  • 2 Erlenmeyer flasks
  • hot plate with magnetic stirrer
  • ring stand
  • clamps
  • aluminum foil
  • cotton balls
  • 2 double-hole rubber stoppers
  • thermometer
  • 3 pieces of 4 inch long, 4 mm wide glass tubing
  • 1 piece of 1 1/2 foot silicone tubing
  • 1 glass measuring cup (5 cups)
  • ice 
  • normal water

Procedure

  1. Weigh an empty flask and record the weight for further use.
  2. Pour 200 ml of the ethanol w/ water solution into the flask.
  3. Weigh the flask with the solution.
  4. Subtract the weight of the empty flask from the weight of the flask with the solution. Record for further use. 
  5. Cover the flask with cotton balls then wrap it up in aluminum foil.
  6. Slide one piece of glass tubing into a hole of the stopper, then, in the other hole, slide the thermometer in so it almost touches the bottom of the flask. 
  7. Drop a spin-bar into the flask and close the flask with the stopper that has the tubing and the thermometer in it.
  8. In the other stopper, slide a piece of glass tubing into one hole and another piece into the other hole. One will be your exhaust tube.
  9. Close the second flask with the second stopper.
  10. Put the hotplate to the left of the ring stand. Place the covered flask on top of the hotplate. Do not turn on the hotplate.
  11. Fill the measuring cup with 3 cups water.
  12. Place the measuring cup to the right of the ring stand, and put a clamp onto the ring stand so it hangs over the middle of the measuring cup.
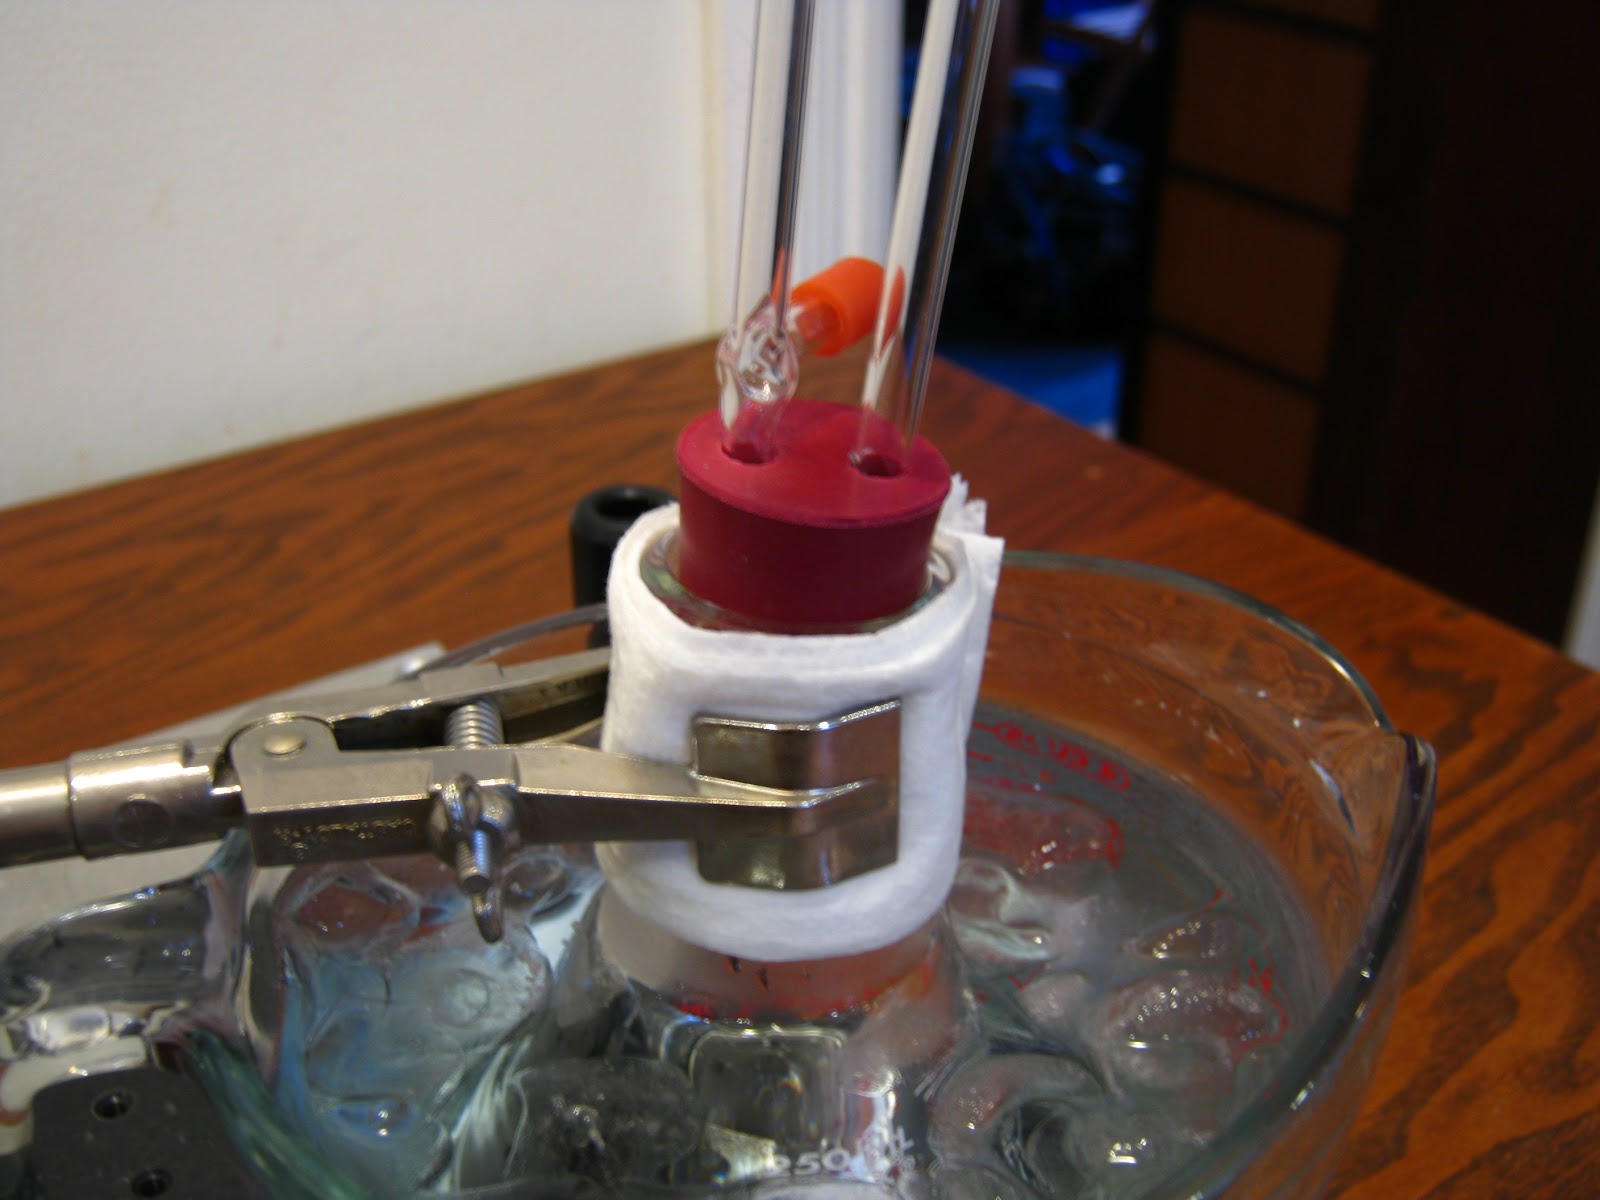
  13. Put the empty flask into the water and clamp it at the neck. Surround the flask with ice.
  14. Attach the silicone tubing to the glass tube on the covered flask, and then attach the other side of the tube to one of the glass tubes on the other flask.
  15. Cover the silicone tubing near the covered flask with more cotton balls and cover it with aluminum foil. This will conserve the heat so the vapor will not condense inside the tubing.
  16. Turn on the hotplate to 120 degrees C and the stirrer to 150 revs./min.
  17. When the thermometer reads about 85 deg. C, the liquid will start to boil. Don't worry, the liquid will stay at that temperature, even with the hot plate a 120 deg. C. The hotplate at 120 deg. C is to make the liquid boil faster and make more vapor.
  18. When the level of liquid in the flask in the water reaches about 30 to 40 ml, turn off the hotplate.
  19. Disassemble every thing so you have one flask with mostly water, and the other flask with probably 90% of ethanol.
  20. Weigh the ethanol in the flask. Subtract the weight of the empty flask from the weight of the flask with ethanol. You will get the weight of the ethanol. Record for further use. 
  21. Store the ethanol for further use and...............
  22. THERES YOUR ETHANOL!
250 ml flask
Stopper with
thermometer


Flask with cotton balls and
aluminum wrap
Setup #1

Setup #2 with silicon tube covered
 with cotton balls and aluminum wrap

Flask in the measuring cup
and ice setup

Glass tube and exhaust pipe setup


My Results

To find my density of the ethanol and of the solution, I divided the weight of the ethanol/solution by the volume in ml of the ethanol/solution. For the density of my solution I got 0.94 g/ml. For the density of the ethanol I got 0.803 ±0.015.


Sunday, November 25, 2012

Calibrating a Microscope

Procedure

  1. Get an iPod with a retina display and place it under a microscope
  2. Using a microscope camera, take a photo of the screen at 10x magnification, using the application ImageJ.
  3. From the documentation, we know that the size of a pixel is 78 µm, corresponding to 326 pixels per inch.
  4. In ImageJ, use the line tool to measure five iPod pixels, and then look at how many pixels of the camera it corresponds to.
  5. Then, go to analyze, and choose set scale.
  6. In set scale, choose the first box and type how many camera pixels the five iPod pixels are.
  7. In the second box type how many µm the five iPod pixels are (390 µm).
  8. Leave the third box alone and in the fourth box write the unit of measurement which is µm.
  9. Then you can also place a scale bar by going to analyze--tools--scale bar and typing how long the scale bar should be, where it should go, and much more.


ImageJ can be found at:
http://rsb.info.nih.gov/ij/download.html

Hanging Drop Mount

Ingredients

  • toothpick
  • pipette
  • coverslip
  • well-slide
  • petroleum jelly
  • drop of stagnant water
  • microscope

Procedure 

  1. Place a coverslip on a clean, flat surface. Use a toothpick to spread a small amount of petroleum jelly around all the edges of the coverslip. Use enough to form a seal between the coverslip and the slide.
  2. Using a pipette, place a drop of the  stagnant water in the center of the coverslip.
  3. Invert a well slide (well side down). Center the well over the coverslip. Use just enough pressure to make sure the coverslip seals to the slide (Don't press to hard or the jelly will ooze into the specimen area).
  4. Invert the assembly so the coverslip is on top. The drop should be suspended in the well from the coverslip).
  5. Observe the slide under a microscope.

Observations

In the drop I found a cluster of organisms. I saw cells, long cells and some moving tiny organisms.


Long cells 100x


Cluster at  45x


More long cells 100x
Four cells 100x


Five different cells 100x